Thursday, August 29, 2013

Gramma's Chili and Zippy's Recipe!


Mmm, Chili. . . Who doesn't love chili? It's a seemingly simple dish with a complexity of flavors that can be molded to suit anyones craving. Best of all, it's good no matter what time of year it is. And everyone's got that Grandma, Grandpa, Aunty, Uncle, Mom or Dad that is known for making a killer bowl of chili. Some are known for making a ridiculously spicy chili, while others are known for making a mild but super savory chili. No matter what kind of chili it is, everyone loves it!

When I was young I would visit my grandparents every summer, and every summer I would learn a different recipe from my Gramma. Gramma was an awesome cook. She would make cooking, and cleaning, seem like a smallest of chores. The best part about her was that almost all of our vegetables came from her and Grandpa's garden. They were serious gardeners. She even taught me a system for cleaning dirty dishes as we made them, during the cooking process (best thing I ever learned in the kitchen). 

Coming from Hawaii to San Jose, the weather was kind of a shocker for me. Super hot days with freezing cold nights. I was already familiar with the heat but with night temperatures below 60 degrees, I was always wrapped up in a blanket or jacket or towel or whatever I could get to keep warm. I loved the cold though, as long as I had something to keep warm when I needed it. It always felt refreshing and clean. 

Well, one summer Gramma decided to teach me how to cook chili. What I loved about how she taught me things was that she would explain the whole process beforehand and while actually doing it she would go step by step on what we're doing and why we're doing it. I think the "why" was a key part in how I learned her recipes so easily. It's hard for me to do something without knowing the purpose or the outcome (applies to almost everything in life for me). 

So for her chili, we had to buy the ground beef from the store, but everything else came straight from her garden. I helped her chop up all the vegetables while she carefully watched me, correcting when I need it too. She would tell me about how all the veggies need to be cut around the same size so that it cooks evenly together. Most of the men were tall, on my father side of the family. Since I was also very tall, I was tasked with grabbing the big heavy pots that Gramma was somehow able to store in the tallest part of her cabinets but never able to retrieve, at least while I was in town. She liked making chili in her heavy duty enameled cast iron french oven (not a cheap kitchen accessory). After everything was    prepped and ready, we got started:

Gramma's Chili

Ingredients:
  • 1 pound ground beef
  • 1-2 onions, chopped
  • 1 med. green bell pepper, seeded & diced
  • 4 cloves garlic, chopped
  • 2 cans stewed tomatoes
  • 1 small can tomato paste
  • 1 can kidney beans, drained & rinsed
  • 1 can pinto beans, drained & rinsed
  • 3 tbsp. chili powder
  • 1 tbsp. garlic powder
  • 1/2 tbsp. brown sugar
  • 1/2 tbsp. cayenne pepper
  • salt and pepper to taste
  • water to cover
  • flour & water for optional thickener 
Preparation:
  1. In a large pot, combine ground beef, garlic, onions, bell peppers and sauté until meat is browned and veggies are tender.
  2. Drain excess fat and add stewed tomatoes, tomato paste, all dry seasonings and water (to cover).
  3. Bring to a boil then reduce heat and simmer for 45 minutes to an hour, stirring occasionally and adding water as needed, in 1/2 cup increments. 
  4. Add kidney and pinto beans and simmer for additional 30 minutes.
  5. Salt to taste.
  6. Thicken with a mixture of flour and water, if needed.
If you make this recipe enough times, you'll learn how to thicken it up on it's own due to the tomato paste and pinto beans. But if you're on a budget and want to make little go a long way, you can thicken the chili with flour and water. Practice and patience is key.


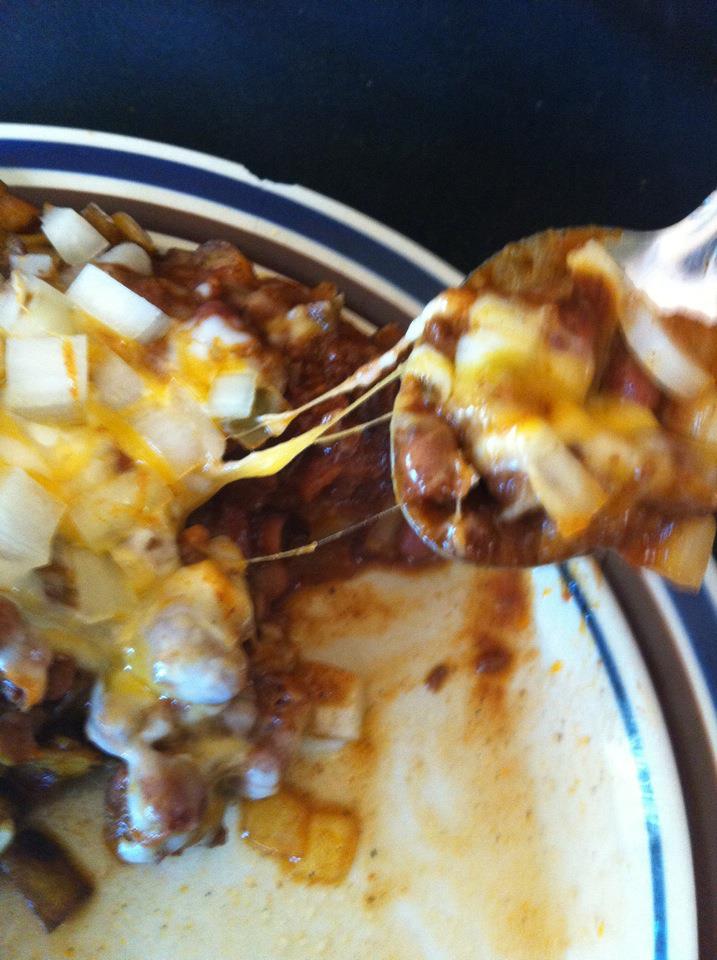
After your chili is made, you can spruce it up with just about anything you want. Some like onions and cheese. Some like it in a bread bowl. In Hawaii we love it with rice. My personal favorite, however unhealthy it is, is with mayonnaise and on a heaping pile of rice. Yes, mayo! Just a spoonful is all it takes, but the chili becomes creamy and delicious!! There are numerous other things you can do with chili too, like throw it over homemade country fried potatoes and add some eggs (another personal favorite), or make an omelette, or just eat it straight up. Add some hotdogs or throw in on a hotdog. Options are endless. 


Also in Hawaii is a local restaurant called Zippy's. It's a local favorite known for their fried chicken and chili, among other things. Actually, their whole damn menu is pretty amazing. The best part is that you can buy their chili by the bucket! And their chicken, and their mac salad, and their rice. It's fairly common for locals to buy each, by the bucket, and combine it all for one meal. 


People for years in Hawaii have all speculated about Zippy's chili recipe. It seems like a simple mix of spices, ground beef, kidney beans and tomatoes but somehow making it at home just doesn't come out the same way. There's a creaminess to it that some have said was peanut butter and others said was well, cream. Since everything now days can be found on the internet, I decided to do a little digging and see what comes up. Sure enough I eventually found an scanned copy of the original 1969 Zippy's Chili recipe, as printed in the Star Bulletin in celebration of Hawaii's 10th year of statehood!! To my surprise, there was no peanut butter or cream in the ingredient list. There were, however, a couple of ingredients I wouldn't have imagined ever being put in chili. Without further adieu, I present Zippy's Chili Recipe:


Who woulda thought that ginger and ajinomoto was in there!?!?!?! And did you notice the bacon? Wow! Try it out and tell me what you think!


Peace & Poi,
Dis Hungry Hawaiian 

Saturday, August 24, 2013

Cucumber Sunomono, Japanese Cucumber Salad


One of my most favorite and simplest dishes to make is Cucumber Sunomono. Sunomono is any form of sliced and pickled vegetable (sometimes with seafood) salad. It's cucumber form is my favorite because it's a light, crispy, sweet and slightly salty refreshing snack that can be eaten by itself or as a compliment to almost any meat dish, regardless of how it's seasoned.

Due to the large Asian influence in Hawaii, as described in previous posts, almost all locals grew up eating some form of this yummy salad at one occasion or another. Personally, I love just about any and all pickled veggies, but this one takes the cake! Unfortunately, it's such a simple dish that I barely have a story to accompany it. But what I do have is the recipe! =)

Cucumber Sunomono

Ingredients:
  • 1 large cucumber, partially peeled
  • 1 teaspoon salt
  • 2 tablespoons rice wine vinegar
  • 1 tablespoon sugar
  • 1 dash of soy sauce


Preparation:
  1. Cut cucumber in half then thinly slice both halves.
  2. In a small bowl, mix salt, rice wine vinegar, sugar and soy sauce.
  3. Add cucumber and toss lightly then refrigerate for 15-30mins.
  4. Serve


Simple right? There are other variations where people have added sesame seeds, onions, sake, carrots, regular vinegar and so forth. Some even remove the cucumber seeds. Sunomono can be any mix of pickled vegetables that you desire, however, some vegetables just don't mix well with others. Daikon (white radish) and carrots are another great mixture that I recommend. Start simple then fine tune it to your taste. 


Try it with some teriyaki skewers or even with a regular steak. You'd be surprised at how versatile this dish is, and it's so simple to make that you kinda don't have an excuse! Let me know what you think and send me pictures of your finish product! 


Peace & Poi,
Dis Hungry Hawaiian

Friday, August 23, 2013

From Garden Bed To Dinner Table. . . A Vegetables Tale


Last year I started a garden for Earth Day, thanks to a CNN.com iReport assignment I decided to partake in. Here's a a bit from my iReport:


"CNN PRODUCER NOTE Kalani Kaikaka of San Jose, California, says his grandparents passion for gardening inspired him to start growing his own vegetables. "My garden is fairly small, but it has all the same veggies that I used to help my gramma and grandpa plant and care for." Kalani Kaikaka is growing tomatoes, bell peppers and jalapeños, all of which he plans to use to replicate his grandparents' homemade salsa.

- stein0726, CNN iReport producer"

Not my greatest writing but hey, it was a start! I documented, via pictures, the growth of my garden and  the foods I made with the fruits of my labor. Here are a few pics from when I started out and the progress I made in the coming months:


As you can see, it literally went from almost nothing and blossomed to a growing beast. I actually had to completely remove one of the zucchini plants because it branched out into 3 large plants and started to block out sunlight to some of the tomatoes. It was an awesome experience since it was my first garden and from what you can see, successful! The problem began when I began picking more veggies than I could eat. In fact, more veggies than I, my 2 roommates, and all my friends and neighbors could eat! I got pretty creative though, making several different dishes with the same ingredients.


The first dish I made was a type of rice and chicken porridge. I didn't really follow any recipe for it because I was craving porridge and I needed to use up some of the veggies. I basically just boiled the rice and chicken in water until it was a thick constancy, then added the veggies and boiled it just until the veggies were tender. Salt and pepper were my only seasonings...


Next I made a simple beef and veggie stir-fry. It consisted of just beef, zucchini, onions, celery and bell peppers. I used oyster sauce, a dash of soy sauce and pepper to season. Threw it on a bed of rice and that was that. Super fast, super yummy, super easy!


While at the supermarket one day I came across Thai red curry paste and decided to give it a try. I bought chicken and a can of coconut milk then did a quick stir-fry of a sort with jalapenos, zucchini, bell peppers, basil, onions and celery. I then added the curry paste, water and coconut milk (all to taste). I love spicy food and this dish was SPICY! My roommates didn't eat much due to the heat... hahaha, more for me!


Finally I made an Indian style chicken curry and my first ever homemade naan bread. To make the curry, I used a generic pre-made Indian curry mix that I bought at a local Indian market, but added the exact same ingredients as the Thai curry. The naan bread was my first attempt to make it at home and although I didn't have the high heat tandoor oven that's typically used to make naan, it came out pretty close to the real deal! From a picture, you can barely tell that it came from my oven!


At this point both my roommates and I were veggie'd out! Aside from my red and yellow cherry tomatoes, which were ridiculously yummy and we ate them like candy, we didn't want to see another vegetable in front of us for a long time...

It was a great experience though. I had other veggies I attempted to grow but none were as successful as the ones in my grow bed. I started another garden again this year and I encourage everyone to grow at least one plant a year. Start small though. It can be time consuming (and somewhat addicting).


Peace & Poi,
Dis Hungry Hawaiian


Thursday, August 22, 2013

Pokē (poh-keh), not Poke (pōk)!


If you're a lover of sushi then you're also a lover of Pokē. It commonly consist of cubed pieces of raw ahi (tuna) or aku (dark meat brother of ahi) and smothered with various seasonings. Its' most simplest form is just raw ahi/aku, Hawaiian sea salt, limu (seaweed) and sometimes small amounts of inamona (roasted and crushed kukui nut, also known as candlenut), however, there are numerous other meats you can use for it.

A word of caution about consuming inamona: Because I don't want to be responsible for for someone carelessly eating inamona, please make sure that your inamona was prepared properly. Eating raw kukui nut is highly toxic and may cause nausea, violent vomiting and stomach cramps. For those of you who don't know what kukui nuts are, it's the same nut that we use to make lei's, as pictured below.


I've been eating pokē ever since I can remember. The only difference now is that there are so many more varieties of Pokē that it's so hard to choose which one to eat. And the price makes it even more difficult, at $10-$17 per pound. The picture on the right shows just how many varieties there are in just a small section. And the prices depicted are from a couple of years ago, so don't expect to get that price now days! 

Typically, pokē is served at just about any damn event you can think of in Hawaii. Birthdays, BBQ's, fishing/camping trips, weddings, kanikapila's (Hawaiian jam sessions) and many more. Us Hawaiians will make up any excuse to eat pokē, or to just EAT! ;) Sometimes pokē is served in platters and sometimes just in individual containers. Checkout the pictures below for some of the different ways I've had it.


My personal favorite, store bought, pokē is from a popular island supermarket called Foodland. Their ahi shoyu pokē is by far one of the best I've ever had. It has a perfect mix of onions, green onions, ahi and a homemade shoyu (soy sauce). The shoyu is salty and sweet at just the perfect mix to not be called a teriyaki sauce but still make a damn good compliment to the pokē. Every time I make a trip back home, I stop by Foodland to get my pokē fix. It's not only really good, it's really cheap in comparison to other places. For the more adventurous eaters, not that I'm not adventurous, there are places like "Da Pokeman Fish Market" in Wahiawa, Oahu, Tamura's Market, Tanioka's and several other places with huge selections of different types of pokē. Another favorite of mine is Tako (pronounced like a Mexican taco) pokē. It's roughly the same as ahi pokē but they use octopus instead.

Most pokē recipes are relatively easy and highly customizable. Try this ridiculously complicated recipe and tell me how you think:

Ahi Pokē

Ingredients:

  • 1 1/2 lbs ahi, sliced to 1 inch cubes
  • 1/2 white onion, sliced to strips
  • 1/2 cup chopped green onion
  • 1 Tb. Hawaiian sea salt
  • 1 tsp. sesame oil
  • 1 tsp. chili flakes (optional)
  • 1 Tb. sesame seeds (optional)

Preparation:

  1. In a large bowl, gently mix all ingredients. Serve or cover and refrigerate. 

See how hard it was? If you had a hard time with this recipe, I don't know what to say. . . except hahaha!!! Seriously though, it's that simple and that good! One thing I want to add is that if you make pokē, it's best with Hawaiian sea salt. You may think that sea salt is the same no matter where it comes from, but that's not exactly true. There are different elements in the different waters around the world, causing different salts to taste different. Of course Hawaiian sea salt isn't exactly easy to come by, but if at all possible, use it! The picture on the right is my goto brand and you can find it in most Filipino, Japanese, or almost any other Asian markets in your area. I brought some home on the airplane once and my check-in luggage got ransacked by TSA because of it, but they let me keep it. Just be careful though!

Throughout history, the Hawaiian culture has contributed much to the world. Think "surfing." Our passion for food has also made an impact to many so good that I recently found out that there is a couple of pokē shops in Las Vegas and since I was in the area, I had to get some! 

Around late April there was a Pure Aloha Festival in Las Vegas that I attended with my roommate, girlfriend and girlfriends parents. A couple of my most favorite Island Reggae bands were scheduled to play and it just so happened to be my girlfriends birthday weekend, so why not, right? We had a blast and even met up with my hanai sister, Tihanai, and her husband, Ben, both of which are from the Bay Area but flew in for the festival. During our weekend in Vegas we decided to eat at a bunch of places, buffets and try out at least one of the pokē shops. 

On the first day of the festival we stopped at Hawaiian Style Poke, just down the street from the festival. Uncle and Aunty were extremely cool people and made all the pokē to order, keeping it as fresh as possible. Normally pokē is prepared in bulk and ready to eat but since the demand isn't the same in Vegas as it is in Hawaii, you get fresher pokē but have to wait just a tad bit longer. And that's not to say there was a long wait, because there wasn't. Plus, Aunty and Uncle were from my hometown so we got to chat it up for a while, or wala'au as we say in Hawaii. We ended up buying 2 large containers of Ahi and Tako pokē, in addition to 3 poke bowls, which we later snuck into the festival. They even had Hawaiian Sun drinks, which are my absolute most favorite drinks on earth! It was so good that by the time I took a picture of it, half of the pokē was already eaten. Just to be eating local food, surrounded by local people, listening to local style music, and have my friends there with me was amazing!

On the second day of the festival, we went back to Hawaiian Style Poke and got even more pokē that we also snuck back into the festival. I think we made pigs of ourselves because even random people were giving us weird looks. . . Proof is in the pic to the right. Checkout the lady in pink watching my roommate and I eat! Hahaha, she wasn't the only one either. We had also bought a ton of food from the booths at the festival, so our table was ridiculously full of food at all times. That's just how we do it though. Like they say in Hawaii, "Eat til' it hurts." And trust me, we do!


Another awesome thing that happened was I met some extended family that I never knew I had and most of all I got to see my nephew, Jamin Tayaba, who moved to Vegas and trains in MMA. How awesome is that? Jamin is an up and coming fighter who dedicates almost his entire life to training. Ever since he was a kid he was a knuckle head, so it only make sense! He's the lil guy  in the pic to the right but do not, I repeat, DO NOT underestimate him. He's like one of those lil red firecrackers that don't seem that dangerous, until if blows your finger off! ;)

And Tihanai, being the networker that she is, got us photos with my favorite band, Common Kings, compliments of Ben's awesome photographer skills (which is why he isn't in the photo)! I've been listening to these guys since they first made an appearance and will probably never stop! I bump their music just about everyday on my way to and from work! I've also seen them just about every time they've been in the Bay Area.

By the way, if you need a great Realtor, Referring Travel Agent, Promotor or Event Organizer, check out Tihanai at www.tihanai.com! She does everything and is amazing at it! =)

All in all it was an amazing trip filled with TONS of food, awesome company, and great music! Best of all, I had freshly made pokē, IN VEGAS!!!!!! =)

Goes to show how much Hawaii's cuisine has made an impact in the world! Give it a try and tell me your thoughts!!

Peace & Poi,
Dis Hungry Hawaiian

Tuesday, August 20, 2013

Spam Musubi


If you've ever been to Hawaii, made a Hawaiian friend, been to a Hawaiian restaurant or just glanced at a Locals' pantry, you'd know that us Hawaiians LOVE spam!!

Back in the day (I don't have the memory for dates) there was a huge military and Japanese presence in Hawaii. With the heavy military presence in Hawaii came foods that lasts long and doesn't need refrigeration, hence Spam. At the time, Japanese were mostly plantation workers and needed a quick and easy lunch item that they could take with them to the sugarcane and pineapple fields. The Japanese, being the smart buggahs that they are, decided to throw spam on a bed of rice and wrap it up in nori (seaweed). Thus the creation of the Spam Musubi. It's been a staple item in local cuisine ever since.

In my hannabaddah days (Aka childhood) we would buy musubi's from the Manapua Man, 7-Eleven, bento houses and more. It was, and is, a quick meal while on the go. Whether you're going to the beach, fishing, hanging out, going theaters (gotta sneak it in your pocket) or just hungry, a musubi was the goto item! As amazingly easy as it is to make, my family never made them. I dunno if they were lazy or what but at $0.50 a musubi from the manapua man, I guess it was more feasible to just buy it.

Musubi's now days cost anywhere from $1-$2 each, in Hawaii. Now that I reside in the Bay Area, I've searched for cheap, and tasty, musubi's but it seems like you can't find one for less than $2 and it's size and taste are subpar at best. I've even seen musubi's run as high as $5 each. That's just RIDICULOUS. . . or so I thought. One day I went to buy a musubi and drink from a foodtruck that boasted "hapa" Hawaiian food, and they wanted $9!! That blew my mind!!! I practically threw it back at them and told them exactly where they can shove that $9 musubi and drink!!

A musubi is and will always be, to me, a simple, cheap and tasty goto snack. It literally consist of only rice, seaweed and spam. Of course there are several new variations since the old days, all of which are very yummy, but it's still intended to be affordable. Try making one yourself then tell me if it's worth $3-$5 each:


Spam Musubi

Supplies:
  • Plastic Musubi Mold
  • Bowl of water
Ingredients:
  • Sliced spam (horizontally cut)
  • Nori Sushi Wrappers
  • Freshly cooked sticky rice (sushi or short grain)
  • Teriyaki sauce


Note: For this recipe I will be using both a plastic musubi mold and teriyaki sauce, but both are optional items. Molding the rice by hand just sucks. I will also use strips of nori that cover the entire length of each musubi because it keeps the teriyaki sauce from making a mess while eating it. You can use any size strips you prefer though!

Preparation:

  1. Remove spam from its can and slice 9 pieces horizontally.
  2. Lightly fry spam for 1-2 minutes per side then pour teriyaki sauce and let soak until ready to use.
  3. Place a spam can or the musubi mold onto 1 sheet of nori, to measure the required size for each musubi, and cut a strip of nori to fit the length of the can/mold.
  4. Place the mold on the end of the strip of nori that's closest to your body.
  5. Fill mold with rice and pack it down with the mold lid until the mold is at least half way full.
  6. Remove mold by pressing down on the lid and pulling the mold up and away from the packed rice.
  7. Place of piece of spam onto the rice and fold they entire combination over until fully covered in nori. (If done properly, you should end with a small strip of nori on the bottom of the musubi).
  8. Seal nori by dipping your finger in water bowl and running it across the length of the remaining nori strip, then folding it over and pressing it down for a second or two.


Voila! Done. . .

As stated above, there are many variations and each just depend on what your preference is. Spam doesn't even have to be the main ingredient. 7-Eleven in Hawaii sells Chinese sausage, mochiko chicken, hotdog, longanisa & eggs musubi's and more. What's your favorite?


You can usually find plastic musubi molds at Asian store (Japanese to be specific) but if not, get creative!! I've seen and done some amazing things on a budget! ;) Check my pics below to see how I get down:


If you liked this recipe, please share with friends. It's simple but always a crowd pleaser!


Peace & Poi,
Dis Hungry Hawaiian


Monday, August 19, 2013

Hawaiian Style Beef Stew. . . Or is it?


I've always wondered how beef stew became such a staple in Hawaii. Don't get me wrong, it's an amazing dish that I grew up eating, but nothing about it is local other than the fact that us locals LOVE it! Typically, a stew is a stand alone dish that is a complete meal in and of itself, right? Maybe true in most parts of the world but not in Hawaii. If you're ordering beef stew, you're getting beef stew over a bed of rice and a side of mac salad! That's just how we do it in Hawaii. Maybe that's what makes it local?

As I got older and more and more into cooking, naturally I learned how to make beef stew. It was the perfect dish to make for large families when you're on a budget. My late Aunty Kathleen was the first person to teach me the recipe. She was known in our family as a great cook. If you told aunty Kathleen she had $5 to feed 15 of us, she'd come back about an hour later with a hot meal fit for a king! Her recipe was the most basic of basics:

Hawaiian Style Beef Stew
Ingredients:
  • beef chuck roast (or any other cut you prefer)
  • onions
  • celery
  • carrots
  • potatoes
  • garlic cloves (crushed)
  • salt and pepper (to taste)
  • 2-3 bay leaves
  • dash of soy sauce
  • flour
  • tomato paste (or sauce)
  • water
  • olive oil
Preparation:
  1. Cube beef, onions, celery, potato and carrots into 1-2inch large pieces. Keep potatoes on the larger side.
  2. In a bowl, coat beef cubes with salt, pepper and flour.
  3. Add a couple tablespoons of olive oil into a large pot over medium-high heat then add beef cubes and crushed garlic.
  4. When beef cubes are well browned on each side add tomato paste, bay leaves, onions.
  5. Add water (to cover) then bring to a boil and let it simmer on low heat for 1-2 hours, until beef is tender.
  6. Add potatoes, celery, carrots and a dash of soy sauce then simmer for another 15-20 minutes or until potatoes are tender.
  7. Season with more salt and pepper, to taste.
  8. To thicken the stew further,  add extra potatoes in the beginning and mash them up once they are tender, or you can mix flour and water then whisk it into the stew.
  9. Serve Hot!

    Now comes the question of where did this style of beef stew come from? Throughout the years I've learned several versions and eventually settled upon one to my very own liking. I like to add green beans and cabbage 10mins before finishing off the stew, as well as some secret spices, as seen below (green beans are hiding underneath). I've also learned various other types of stews and the one thing I found a lil peculiar was that Irish Beef Stew and Hawaiian Beef Stew are almost exactly alike! I'm thinking that somewhere in history an Irish man landed in Hawaii and made this awesome dish. Hawaiians, being the lovers of food, then started making it as well. Is this confirmed? No, but it's definitely food for thought!


    My roommate loves to make it with beer, particularly Guinness. Either way, try one of these recipes out for yourself and let me know what you think! =)

    Peace & Poi,
    Dis Hungry Hawaiian